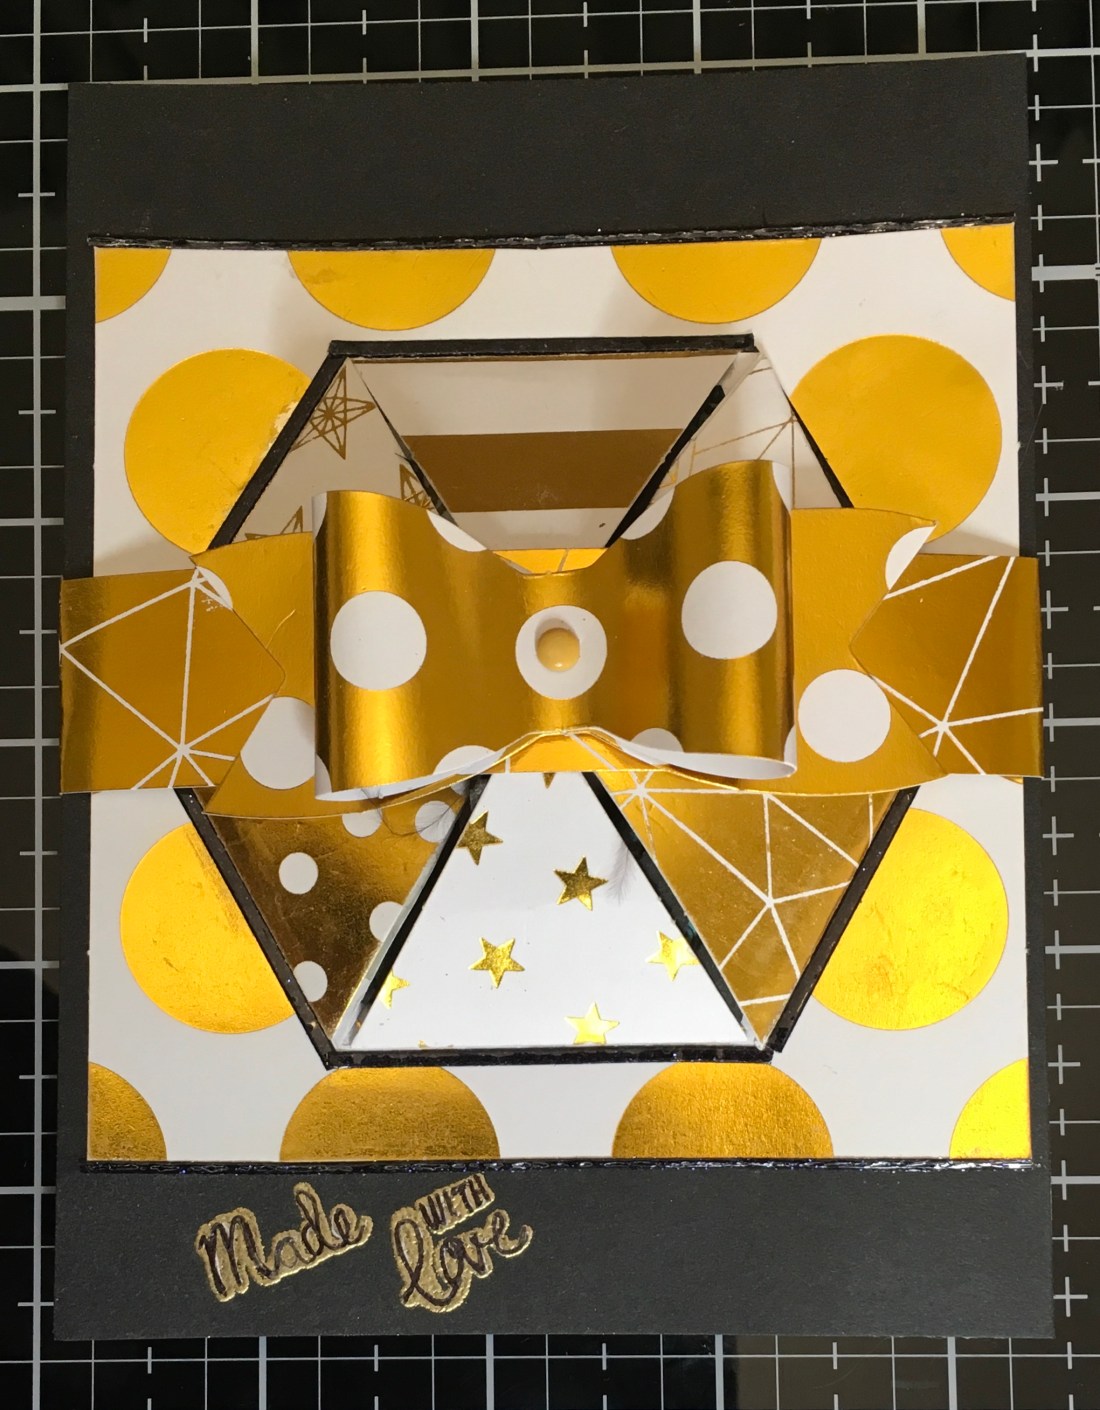
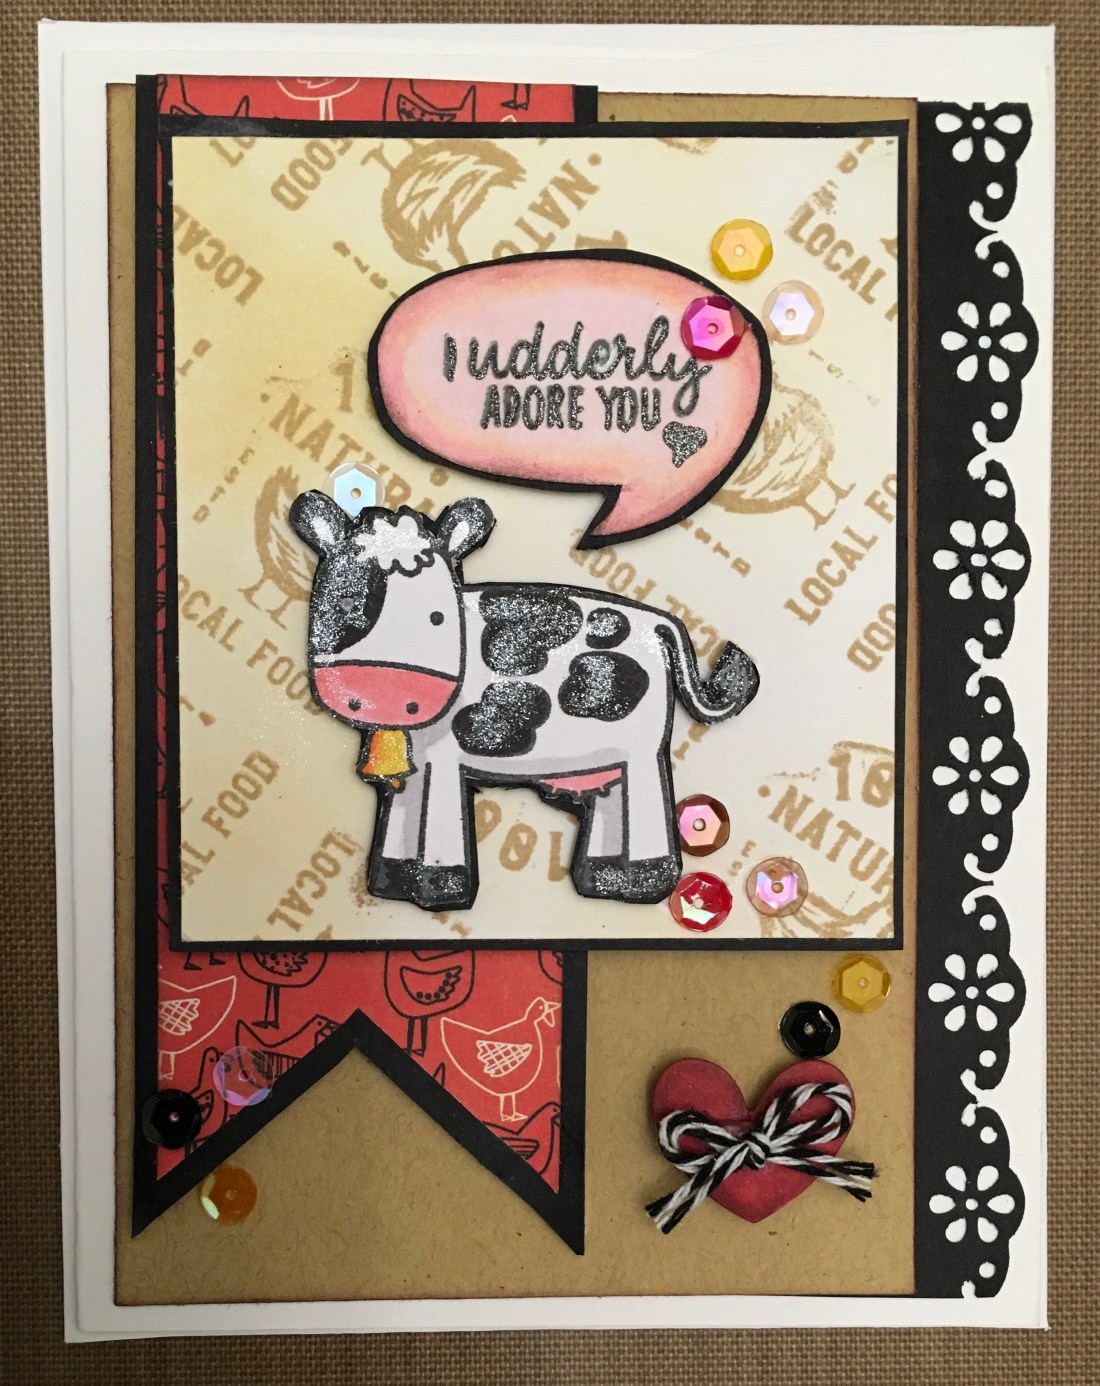
The next card making kit is Hero Arts July 2018.
MMH (My Monthly Hero) is a great kit! This month it includes three sample ink cubes: Red Reactive, Blue Reactive, and Unicorn white. This is only my second kit from My Hero Arts, but already the inks that were included in the April kit are some of my favorites! The July kit includes 10 dies, and a full card size sort of sun burst die, a 6 x 8 set of stamps that includes 11 sentiment (some single words) stamps, a full 5” x 1” background stamp that includes farm and fair/carnival images, a Ferris wheel, roller coaster, merry go round and snack/ticket booth stamps. Also included an bi-wing airplane pulling a banner, 3 balloons, an hot air balloon, cloud, and fireworks stamps. There are five border stamps, including a fence, dots, stars, diamonds (or flags?), and a corner with 2 sides . There are 3 extra heavy weight postcards, and of course the 2 sided image board that comes between the dies and stamps. And its all wrapped and tied with two lengths of ribbon, red and blue.

I always think that Hero Arts encourages you to explore your own creative backgrounds…and of course you’ll need to go into your stash for card bases, and other papers, inks, and embellishments (if desired). So, the gloves are off! Let’s go and see what kind of cards can be created with this great fair oriented kit!
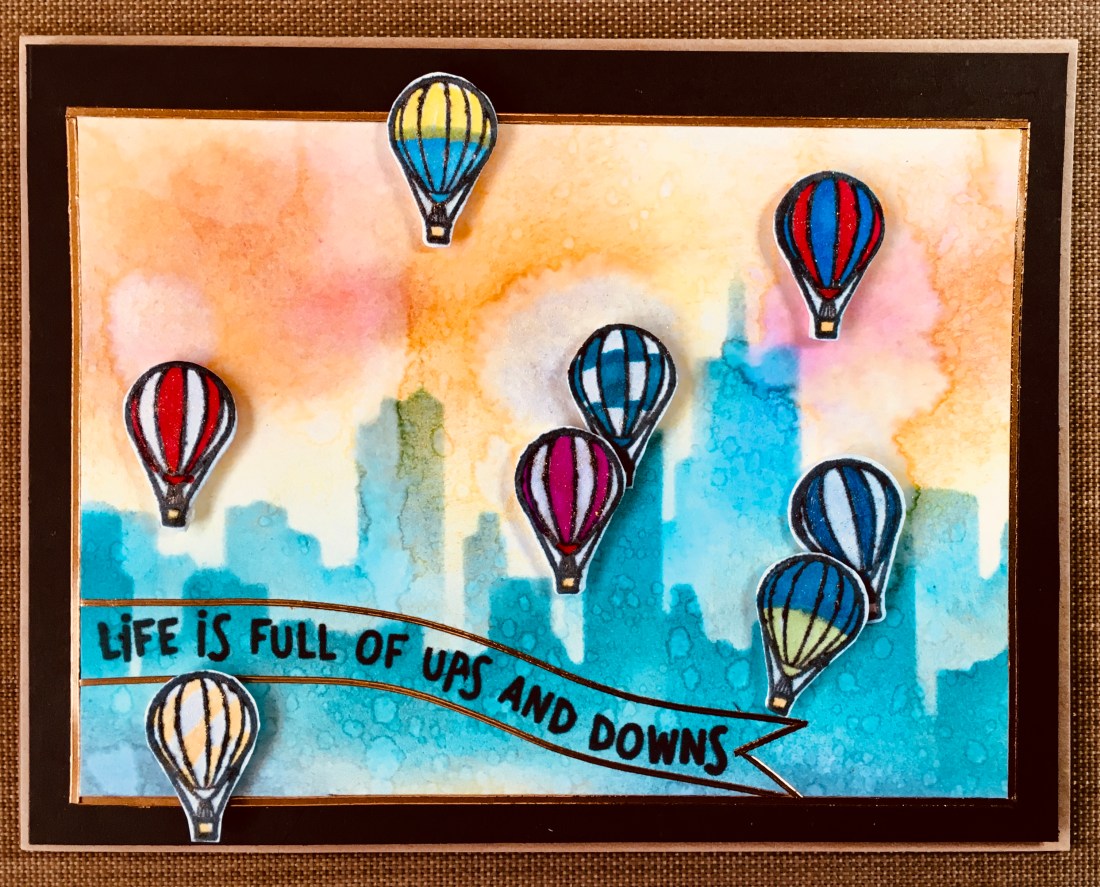
I had so much fun with the hot air balloon images in another kit that I really want to play with the hot air balloon stamp in this kit right away. I recently allowed myself a stash building shopping binge and one of the items I picked up was Altenew’s City Scene Stencil. Using the stencil with inks from the April My Hero kit, Fiesta Red, Fiest Blue, and Fiesta Yellow, as well as Altenew’s Crisp Dye Inks (Dew Drops and Sea Breeze), I created this background (which has also been spritzed with water for the reactive textures).

You can see a few of the hot air balloons created with stamp and die cut from the kit, colored with Bic ultra fine markers and metallic gel pens. I stamped a sentiment from Lawn Fawn’s Coaster Critter (LF1694) stamp set which says “Life is full of ups and downs” and is similar to the MMH stamp in the kit which says “I’m here for you through ups and downs”. I like both sentiments…but felt like the Lawn Fawn sentiment went better with the hot air balloon theme. For bells and whistles I used some copper pin-stripe stickers from Love From Lizi ( I love them and I think they may be exclusive with Love From Lizi…or at least I have not found them elsewhere) to create a thin border around the background image and to create a banner effect around the sentiment. I mounted the background image on brown cardstock from my stash, popped it all up on a natural card base from Darcie (in keeping with the natural color of the post cards included with the kit). Next I popped up the balloons with foam tape and gave all the balloons a bit of shine with gold shimmer pens from Close to My Heart. And card number 1 is finished.
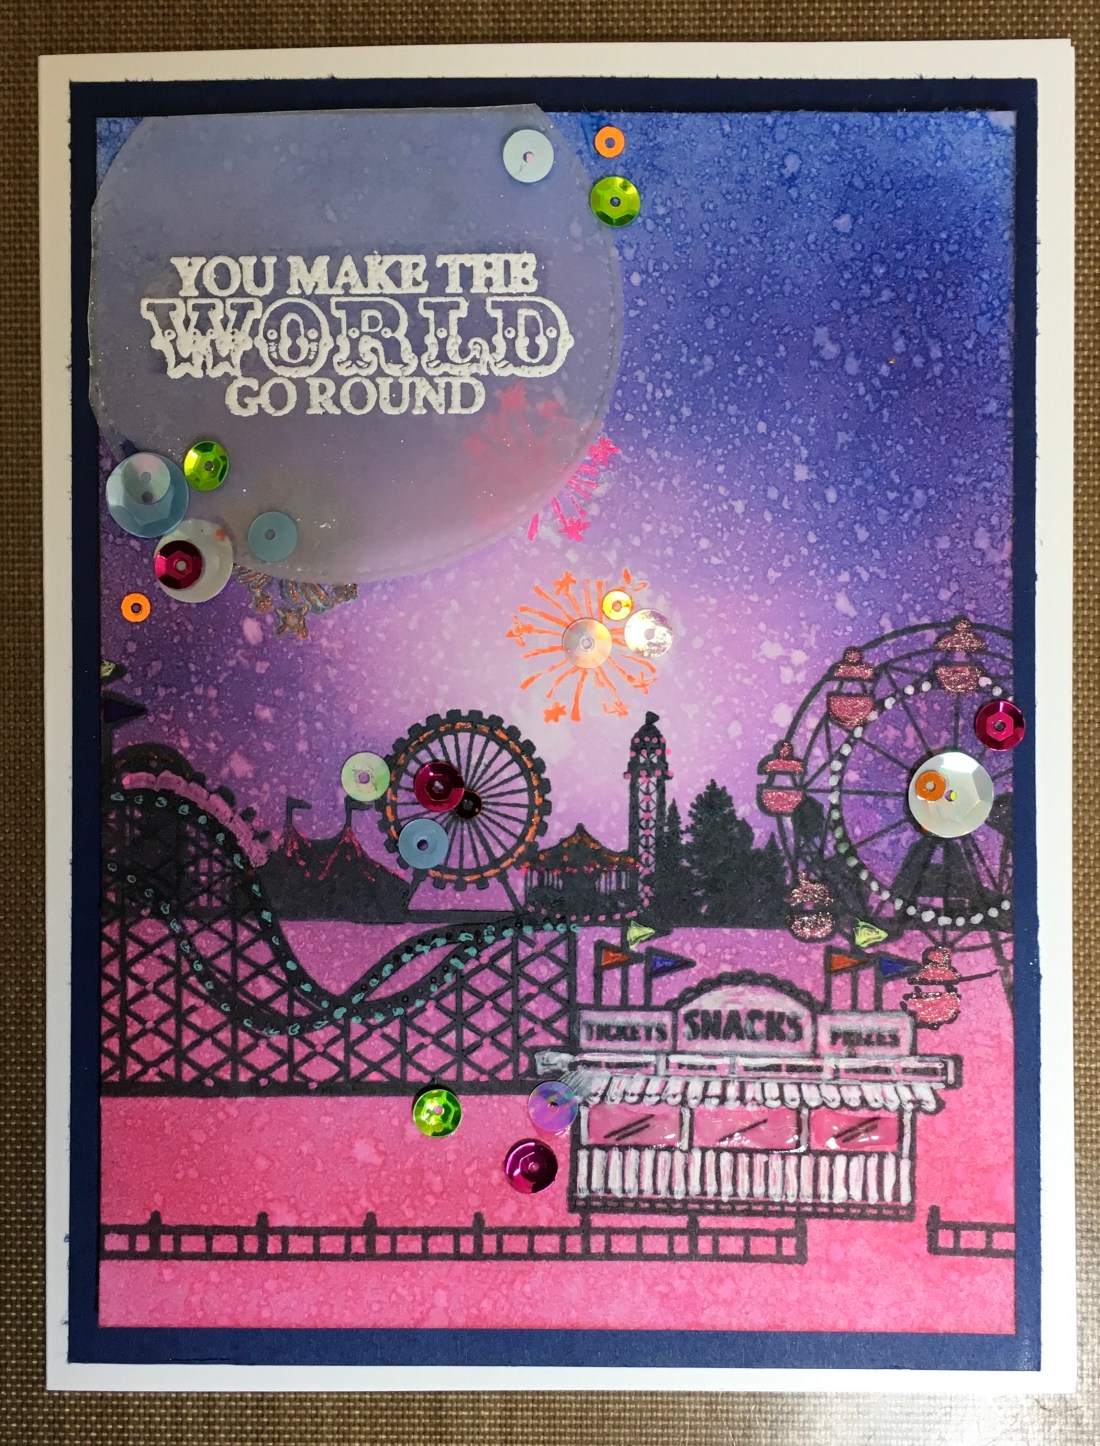
The inks that came in this month’s kit, Reactive Red, Reactive Blue, and Unicorn White are fun colors for patriotic holidays and months. So I next decided to play with only those three colors and see what kind of a background I could come up with.

Very nice ink colors to work with. The Reactive Red leans more towards a hot pink (there’s a watercolor called ‘Opera’ that strongly resembles Reactive Red). The inks blend beautifully, and the unicorn white ink sits nicely on top or blends in . And all three are reactive, as you will see when you look at the finished card. Also the kit is full of fun stamps. So, for this card I decided to use several of the stamps and create an evening at the fair card. I blended the three inks that came in the kit, and spritzed the entire background with water. I stamped the long narrow background fair stamp, and then tried to stamp the fire works. I wasn’t impressed with lack of “pop” on my fireworks until I used fluorescent gel pen to trace the stamps. To continue the effect, I used the gel pens to create lights that lit up the fair structures. Then I carefully stamped the roller coaster, the Ferris wheel and the snack shop/ticket booth…trying to create a sense of space within the “picture” frame, and also mindful that the background stamp was visible through the larger stamped images in the foreground. I once again put my gel pens to work, and even added some Nuvo translucent drops to the windows in the snack shop/ticket booth. Stamped the sentiment in unicorn white on a piece of vellum cut with a stitched circle die, and embossed it with white. To finish up the sparkling fireworks effect, I added plenty of sparkly sequins. I popped it up with foam tape on a dark blue, and adhered it to a white card base. And that completes card number two.
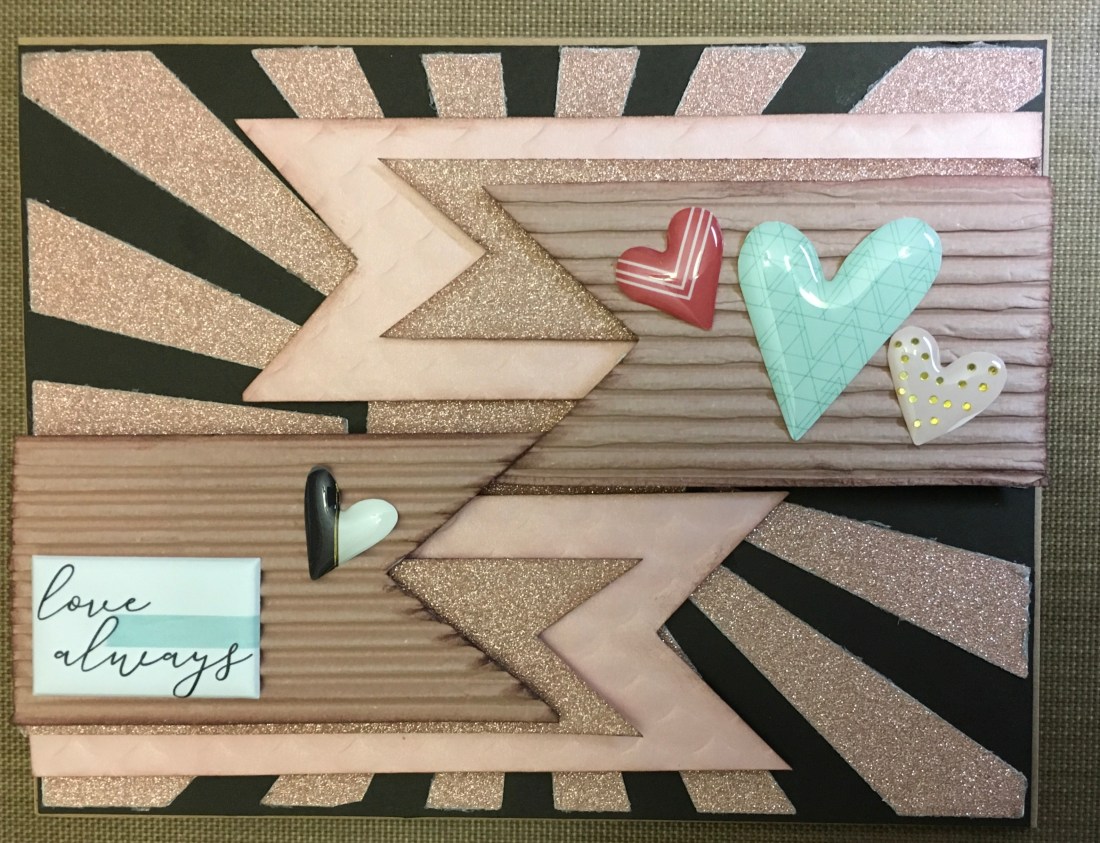
And so on to card three… I wanted to use that great background die that came in the kit and went to my stash for some interesting papers that would allow me to use both the positive and the negative shapes created by the die. I found some rose gold glitter paper, and a piece of rose gold corrugated paper. This meant that card three actually became four card bases.
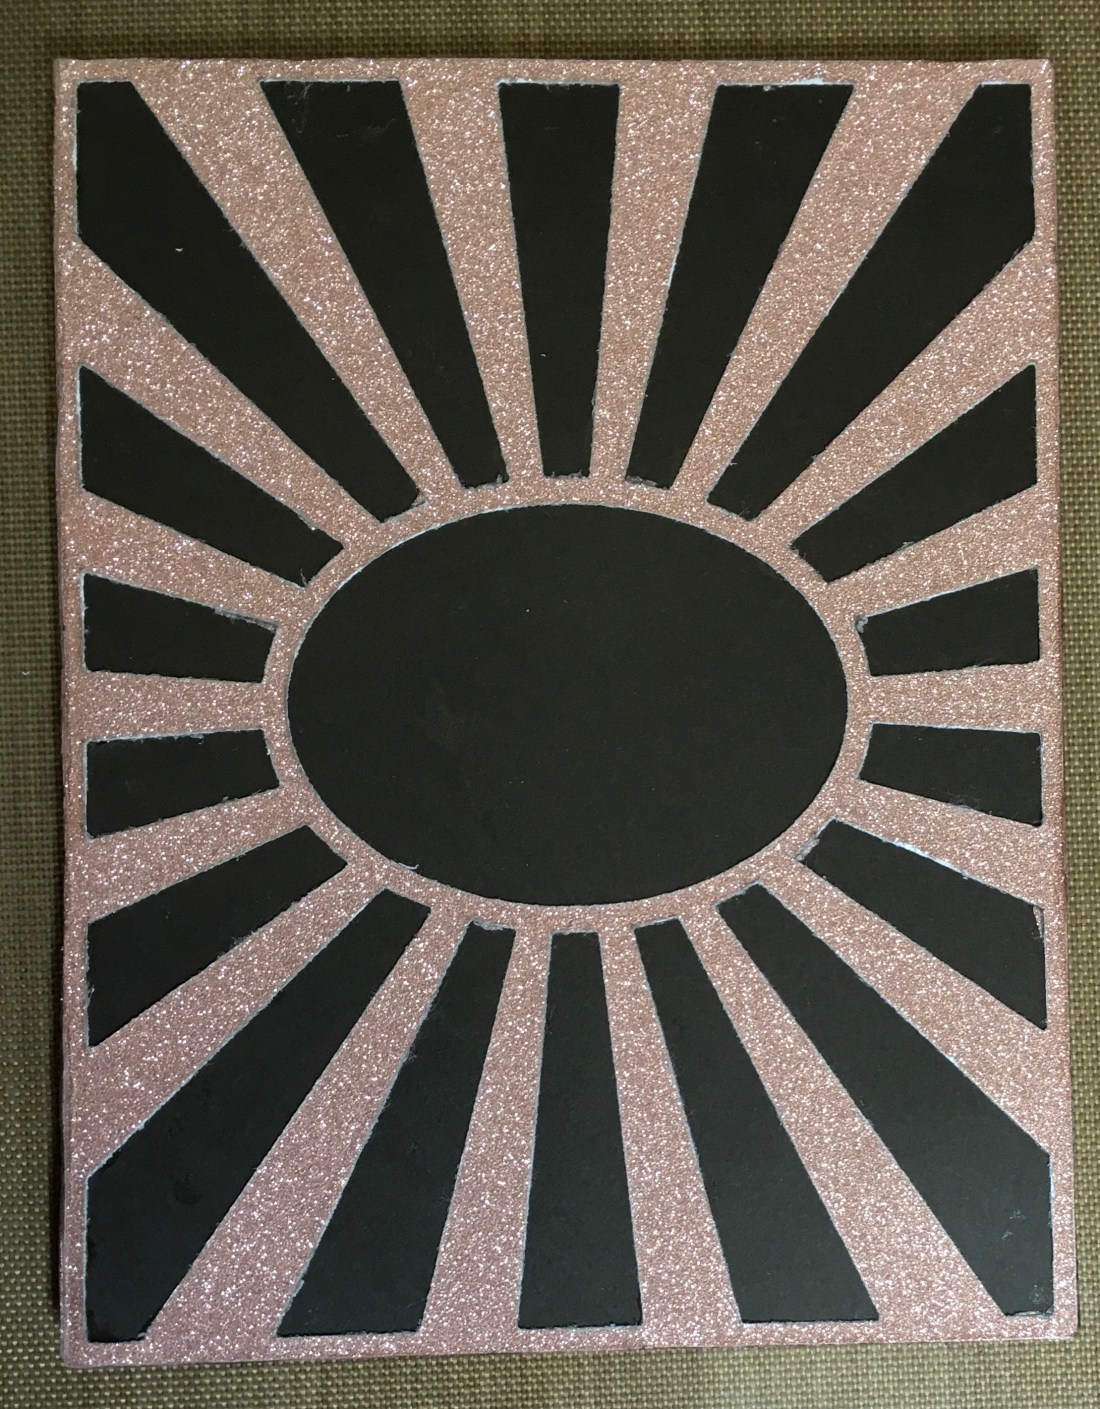
The rose gold glitter paper did not cut well. I ran it through my big shot many times, rotating it each time…and finally ended up using my craft blade to finish cutting it out. Unfortunately, the multiple attempts to die cut it, let the edges a bit ragged. But, it still looks very nice on a dark brown piece of card stock. Above is the positive, below is the negative cut out pieces adhered to another piece of dark brown card stock.

Again you can see some rough die cut edges…but the rose gold is such a lovely paper I decided to go ahead and see what I could make with it.
(At this point I realized I had taken these photos with “True Tone” turned on…which is not a good thing to do to photos…I’ll try to remember to redo them!)
Card number 3 uses the positive die cut section (you can see the burst piece are all connected on the outer edge, and the center oval is cut out). For this card I stamped the tickets to fun in Adobe. My initial intention was to use them for a border piece. But I decided they didn’t “fit” with the radiating sunburst effect. I next cut a tag from the rose gold corrugated paper and tied a double bow with the red and blue ribbon that came in the kit. I added the tickets and payed it on an angle over the center cutout area. (I’m not sure the photo does it justice…this is really a striking effect..) With tickets…you need rides. I stamped the border scene in Unicorn White, and embossed it clear embossing powder. The resulting color is very “cool”, where the rest of the elements have a “warm” tint. This has the effect of moving the viewers eye from the ribbon and tickets to the scenery, and then back up. As I studied this card, I decided the effect I was creating was one of “big dreams” for a visit to the fair…so I needed to add something to help the eye move “around” the picture plane, rather than bouncing up and down. I had some rather large star sequins in my stash and laid a few on the card and liked it right away. So, card number three was complete.

Now for card number four. I had all those fun rose gold papers to consider, and I liked using the sunburst for an abstract background. So, I cut three banners of different lengths and laid them on the top right side of the card base. Next I looked through my stash to see if any of my sentiments would fit the evolving card. I picked up a sheet of puffy plastic stickers. I’m not really a sticker on cards person…but I do try to use items in my stash and items that come in the kits. I liked the banners on the card base….but I didn’t like the half of an oval center . So I cut a second set of banners and laid them on the card base with the “love always” puffy sticker sentiment. It was starting to feel like a hug…but the puffy heart stickers just didn’t have enough sparkle. So back to my stash and found a few “puffy” looking enameled heart stickers. Perfect. Again….there’s a lot of texture in this card, and the real thing looks much better than the photographed image.
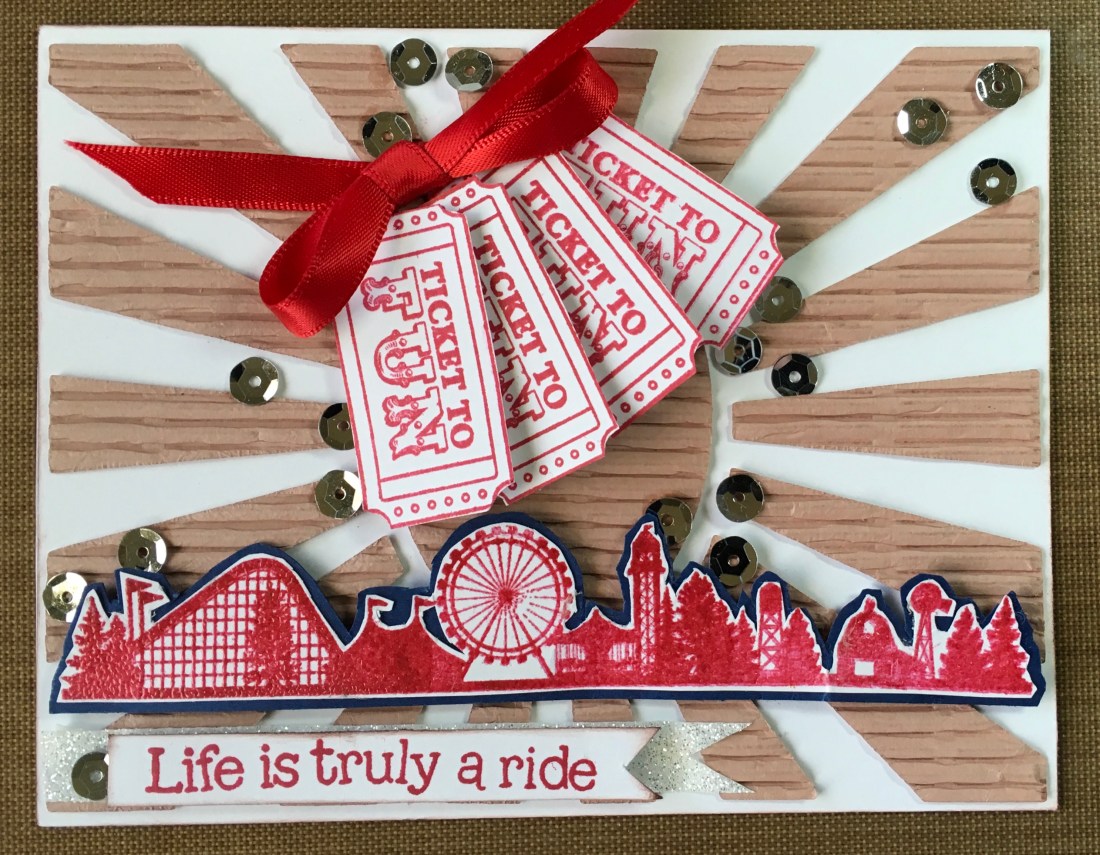
I still had the two corrugated backgrounds to use. The next card was fairly simply. I printed for tickets using the reactive red ink and popped them up, one layer of foam at the base, and two layers near the fanned and lifted edges. I used some of the red ribbon to tie a bow, and added it to the card. I was trying for an all red and white card, so printed the fair border in the reactive red and embossed it with clear embossing powder. When I added it to the card, it seemed a bit lost, so I backed it with some dark blue cardstock and fussy cut around it. The sentiment is from my stash, but only because I liked the juvenile feel of the font. After all, anytime I’ve attended a fair I was either a juvenile myself or was taking one to ride the rides. I did add a bit white shimmer tape, and some silver sequins for a bit of shine.
I thought my fair ideas were beginning to feel stretched…so I decided to see what else I had in my stash…after allI still have that great background die. I found several combinations and created card bases.
Yes, I did take them outside to photograph them…and yes that is pine tree reflection winking at you from the mirrored card stock. I put these away to be used at a future time. And thought I might try a “spinner” card for my next county fair themed card.

I may yet redo this card. When it began, I was building a maze for an “you’re amazing card. Then, when I photographed it I realized my stamping was not as straight as I thought. It’s a fun little spinner card and the sentiment inside will definitely say “You Make My World Go ‘Round!”
One of the reasons I got started designing my own cards was because I am never happy with purchased cards. And in making some of the cards in this set…I had the same feeling. So I started the next card with a bit of “sentiment” research. I found a nice bit of phrase with no author attached, and set out to create an ‘empty field’ feeling background using distressed oxides. I used printed the sentiment on vellum and mounted it to my “field” background. Next I used Spellbinders’s card maker “You Are My Sunshine” and cut a frame out of red card stock. I used a bit of Nuvo drops…and decided I like the verse more than the card and started over. And created the kind of card I am more comfortable with. A bit of shine, a bit of class, as it is black, white and silver, and a very nice verse.
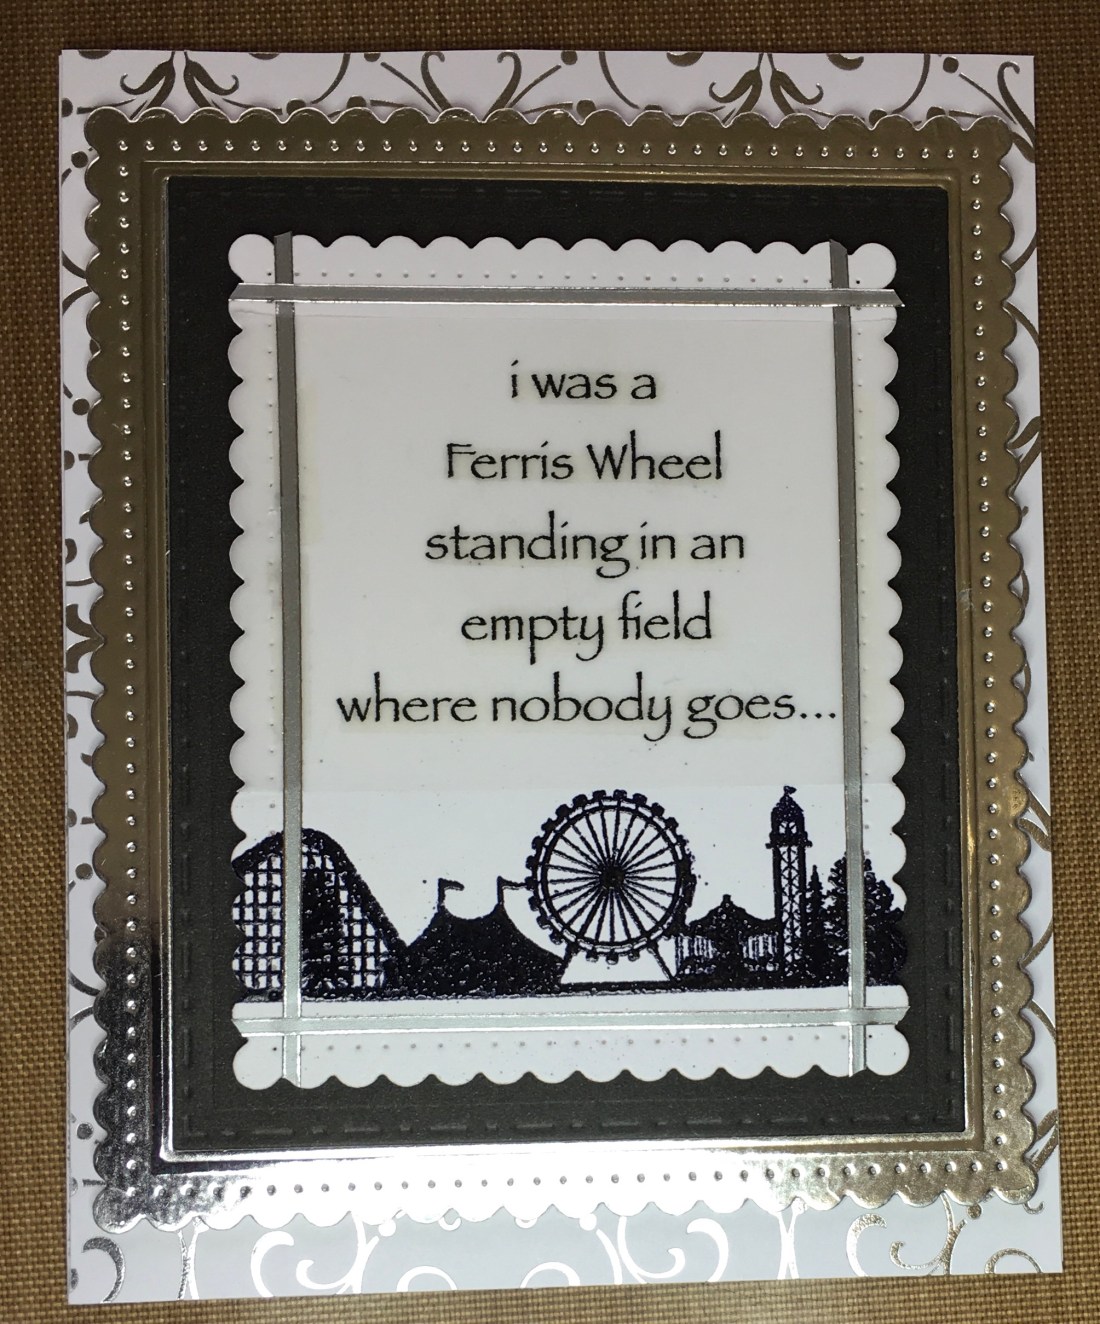
I really liked the results. I did go into my stash for some silver foiled patterned paper and card stock, I printed the fair border scene with versified ink and used black embossing powder. I used Spellbinders’s Fancy Edged Rectangles to create the frames, and Love From Lizi’s silver adhesive lines. The verse was printed on vellum using my printer. I actually think this would make a nice anniversary card. The verse certainly indicates that there was a time before now, so I think I’m just going to leave the inside blank for now.
My fair affair may have run it course. I tucked all those sparkly card bases away, and looked longingly at my next box, full of cards just waiting to be designed. I hope something here has inspired your own card designs. And I’ll see you soon with more card crafting ideas!